Getting Started
Launch Coldmaps and you'll see an empty canvas. This is your workspace for mapping wallets.
Interface Overview

Canvas — The main workspace. Infinite in all directions. This is where your wallet nodes live.
Toolbar (left) — Primary actions: Add wallet, Zoom controls, Auto-layout, Undo, Settings.
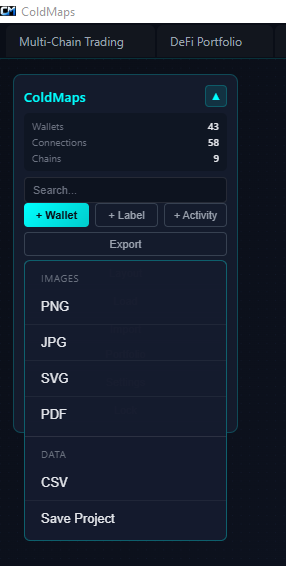
Stats Panel (bottom-left) — Shows wallet count, connection count, and chains in use.
Minimap (bottom-right) — Bird's eye view of your entire map. The white rectangle shows your current viewport. Click anywhere on the minimap to jump there.
Search (top-right) — Filter wallets by label, address, chain, or notes. Matching wallets highlight; non-matches dim.
Navigation
Pan — Click and drag on empty canvas space to move around.
Zoom — Scroll wheel to zoom in/out. Pinch on trackpad also works.
Fit to view — Double-click empty space to fit all nodes in view.
Reset zoom — Press 0 to reset to 100% zoom.
First Steps
1. Click + Add to create your first wallet node.
2. Enter a label (e.g., "Main ETH"), paste the address, select the chain.
3. Drag the node to position it on the canvas.
4. Repeat for other wallets. Draw connections between related wallets.
5. Use Export to save your map as an image or encrypted backup.
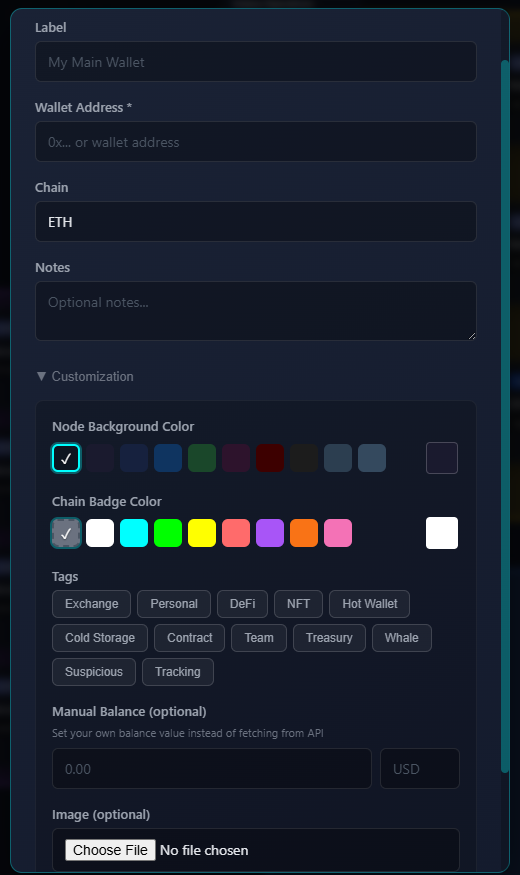
Adding Wallets
Click + Add in the toolbar or press N to open the Add Wallet modal.
Required Fields
Label — A human-readable name for this wallet. Examples: "Main ETH", "Cold Storage", "DeFi Ops", "Ledger #1". This appears on the node.
Address — The wallet's public address. Coldmaps validates the format based on chain:
— EVM chains (ETH, MATIC, ARB, HYPE, etc.): 0x followed by 40 hex characters
— Solana: Base58 string, typically 32-44 characters
— Bitcoin: Starts with 1, 3, or bc1
— SUI: Starts with 0x, 64 hex characters
— Aptos: Starts with 0x, 64 hex characters
— TON: Base64 or raw format
Chain — 20+ chains supported: ETH, SOL, BTC, MATIC, ARB, OP, BASE, BSC, AVAX, HYPE, SUI, APT, TON, NEAR, and more. Each chain has a distinct color.
Optional Fields
Notes — Free-form text that appears on the wallet card. Use this for context: "Created Jan 2024", "Seed phrase in safe deposit box", "Used for Uniswap LPs only".
Tags — Select one or more from 12 presets. Tags appear as colored badges on the node. Useful for filtering and organization.
Node Color — Override the default chain color with a custom background. Useful for visual grouping beyond chain type.
Edge Color — Default color for connections originating from this wallet.
Image URL — Add a profile picture, logo, or icon. Accepts any image URL. The image displays as a small circle on the node.
Bulk Adding
For many wallets, use Import CSV instead. See the Import & Export section.
Editing Wallets
Double-click any wallet node to open the edit modal. All fields can be modified. Click the address to copy it to clipboard.
Opening in Explorer
Right-click a wallet and select Open in Explorer to view on the chain's block explorer (Etherscan, Solscan, etc.).
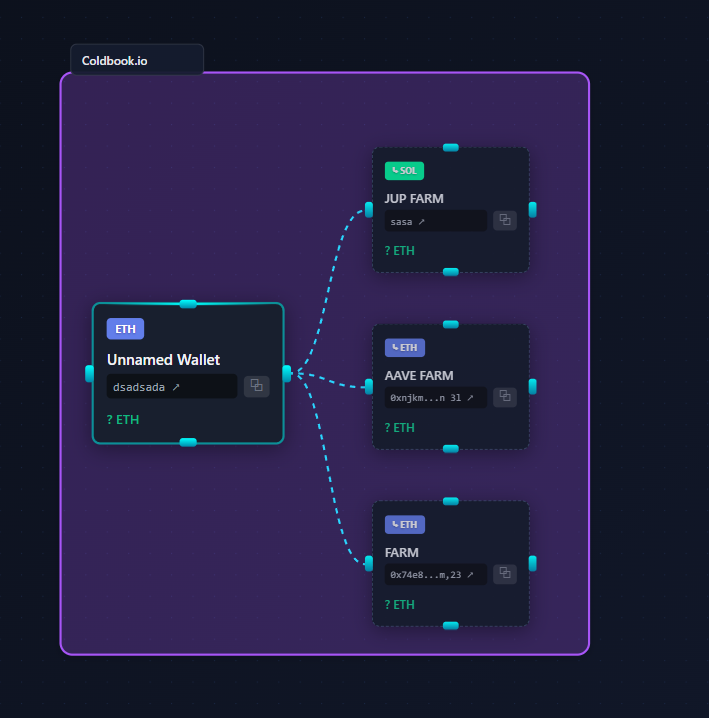
Connections
Connections are lines between wallets that show relationships, fund flows, or any association you want to document.
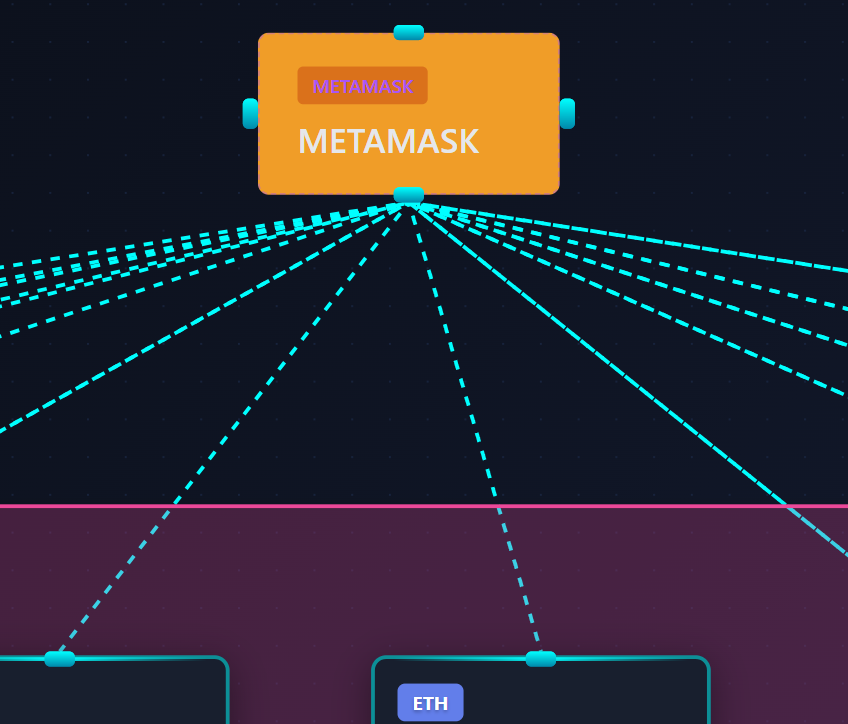
Creating Connections
Each wallet node has 4 connection handles (small dots) on top, bottom, left, and right edges. Hover over a node to reveal them.
1. Hover over the source wallet to reveal handles.
2. Click and drag from any handle.
3. Drop on any handle of the target wallet.
4. The connection is created with a default label and color.
Editing Connections
Click any connection line to select it. A panel appears with options:
Label — Text displayed on the line. Examples: "10 ETH", "Daily transfer", "Funding source", "Bridge to L2".
Color — Change the line color. Useful for categorizing connection types (e.g., red for withdrawals, green for deposits).
Style — Solid, dashed, or dotted lines.
Arrow — Show directional arrow at the end. Useful for indicating fund flow direction.
Delete — Remove the connection.
Connection Use Cases
— Document a transfer: "Sent 5 ETH on 2024-01-15"
— Show ownership: "Same seed phrase"
— Indicate hierarchy: "Funded by" arrows
— Mark bridges: "Bridged via Hop"
— Note relationships: "Multisig signer"
Tags & Notes
Tags
Tags are predefined color-coded labels. Apply multiple tags per wallet. They appear as small colored badges on the node.
Available tags:
— Exchange — Centralized exchange deposit addresses
— Personal — Your personal wallets
— DeFi — Used for DeFi protocols
— NFT — NFT storage or minting wallets
— Hot Wallet — Connected to internet, higher risk
— Cold Storage — Hardware wallet, air-gapped
— Contract — Smart contract addresses
— Team — Shared team wallets
— Treasury — Organizational treasury
— Whale — Large holder address
— Suspicious — Flagged for review
— Tracking — Address you're monitoring
Filtering by Tag
Type a tag name in the search bar to filter. Example: type "cold" to show only Cold Storage tagged wallets.
Notes
Notes are free-form text attached to each wallet. Unlike tags, notes can contain any information.
Good uses for notes:
— Key storage location: "Seed in fireproof safe, garage"
— Creation context: "Created for Arbitrum airdrop farming"
— Access info: "2-of-3 multisig with Alice and Bob"
— Warnings: "DO NOT USE - deprecated wallet"
— History: "Previously used as main wallet until 2023"
Notes appear directly on the wallet card, below the address.
Groups
Groups are visual containers that cluster related wallets together. They appear as colored rectangles behind the wallet nodes.
Creating a Group
1. Select multiple wallets:
— Shift + Drag to box-select
— Ctrl + Click to add individual wallets to selection
2. Click Group in the selection panel (or press G)
3. Enter a group name and select a color
4. The group is created around the selected wallets
Editing Groups
Click the group background (not a wallet inside it) to select the group.
— Drag to reposition the entire group and all wallets inside
— Resize by dragging the edges
— Double-click to edit name and color
— Press Delete to remove the group (wallets remain)
Group Use Cases
— "DeFi Operations" — All wallets used for DeFi
— "Hardware Wallets" — Ledger, Trezor addresses
— "Arbitrum Ecosystem" — All ARB-related wallets
— "Team Treasury" — Organizational wallets
— "Deprecated" — Old wallets no longer in use
Collapsing Groups
Click the collapse icon on a group to minimize it to just the group name. Useful for decluttering large maps. Click again to expand.
Data Storage
Coldmaps is built on a simple principle: your wallet list is sensitive data and should be stored locally.
Offline by Default
With default settings, Coldmaps makes no network requests. No connections to:
— Analytics services
— Crash reporting
— Update servers
— Cloud sync
Optional balance lookup: If you enable balance fetching in Settings, Coldmaps will query block explorers (Etherscan, Solscan, etc.) to display wallet balances. This feature is disabled by default. When disabled, the app works entirely offline.
No Accounts
There is no sign-up, no login, no cloud sync, no subscription. Download the app and use it. We have no way to identify you.
Local Storage
All data is stored in a local SQLite database on your machine:
— Windows: %APPDATA%\Coldmaps\data.db
— macOS: ~/Library/Application Support/Coldmaps/data.db
— Linux: ~/.config/Coldmaps/data.db
For portable backups with true encryption, use Export > Project with a file password. The exported .wmap file is AES-256 encrypted and can be stored anywhere safely.
Why This Matters
Your wallet list reveals:
— How much crypto you own
— Which addresses belong to you
— Your DeFi positions and strategies
— Your organizational structure
— Wallet relationships and connections
Coldmaps keeps everything local so you maintain control of this information.
Verify Offline Operation
You can verify the app works offline with balance lookup disabled. Run a network monitor (Wireshark, Little Snitch, etc.) while using Coldmaps. With default settings, you will see no outbound connections.
Import & Export
CSV Import
Bulk add wallets from a spreadsheet file.
Required columns:
— address — The wallet address
— label — Display name
— chain — Chain identifier (ETH, SOL, BTC, etc.)
Optional columns:
— notes — Free-form notes
— tags — Comma-separated tag names
Example CSV:
address,label,chain,notes,tags
0x1234...abcd,Main Wallet,ETH,Primary hot wallet,Personal,Hot Wallet
7xKp...3mNv,Cold Storage,SOL,Ledger Nano X,Cold Storage
Click Import CSV in the toolbar, select your file. Coldmaps auto-detects columns and shows a preview before importing.
CSV Export
Download all wallets as a spreadsheet.
Click Export > CSV. The file includes: address, label, chain, notes, tags.
Useful for: backup, migration, sharing with spreadsheet users, data analysis.
Image Export
Export your map as a visual image.
Formats: PNG, JPG, PDF
Options:
— Resolution: 1x, 2x, 4x (for high-DPI or print)
— Background: transparent or solid color
— Watermark: add custom text (configure in Settings > Display)
— Selection only: export just selected nodes instead of entire canvas
Click Export > Image, choose format and options, save file.
Project Export (.wmap)
Save your entire project as a portable file.
The .wmap file contains: all wallets, connections, groups, positions, settings.
Encryption options:
— Unencrypted: Plain JSON, readable by anyone. Use for personal backups on secure storage.
— Encrypted: AES-256 encrypted with a password you choose. Use for sharing, cloud storage, or anywhere the file might be accessed by others.
Important: AES-256 is only as strong as your password. Use a long, unique passphrase. A weak password makes even military-grade encryption worthless.
Click Export > Project, choose encryption, enter password if encrypted, save file.
Project Import
Load a .wmap file to restore a project.
Click Load Project in toolbar, select the .wmap file. If encrypted, you'll be prompted for the password.
Import modes:
— Replace: Clear current project and load the file
— Merge: Add wallets from file to current project (duplicates detected by address)
Security
Coldmaps provides two layers of protection: screen lock for local access control, and AES-256 encryption for exported backup files.
Screen Lock (Local Protection)
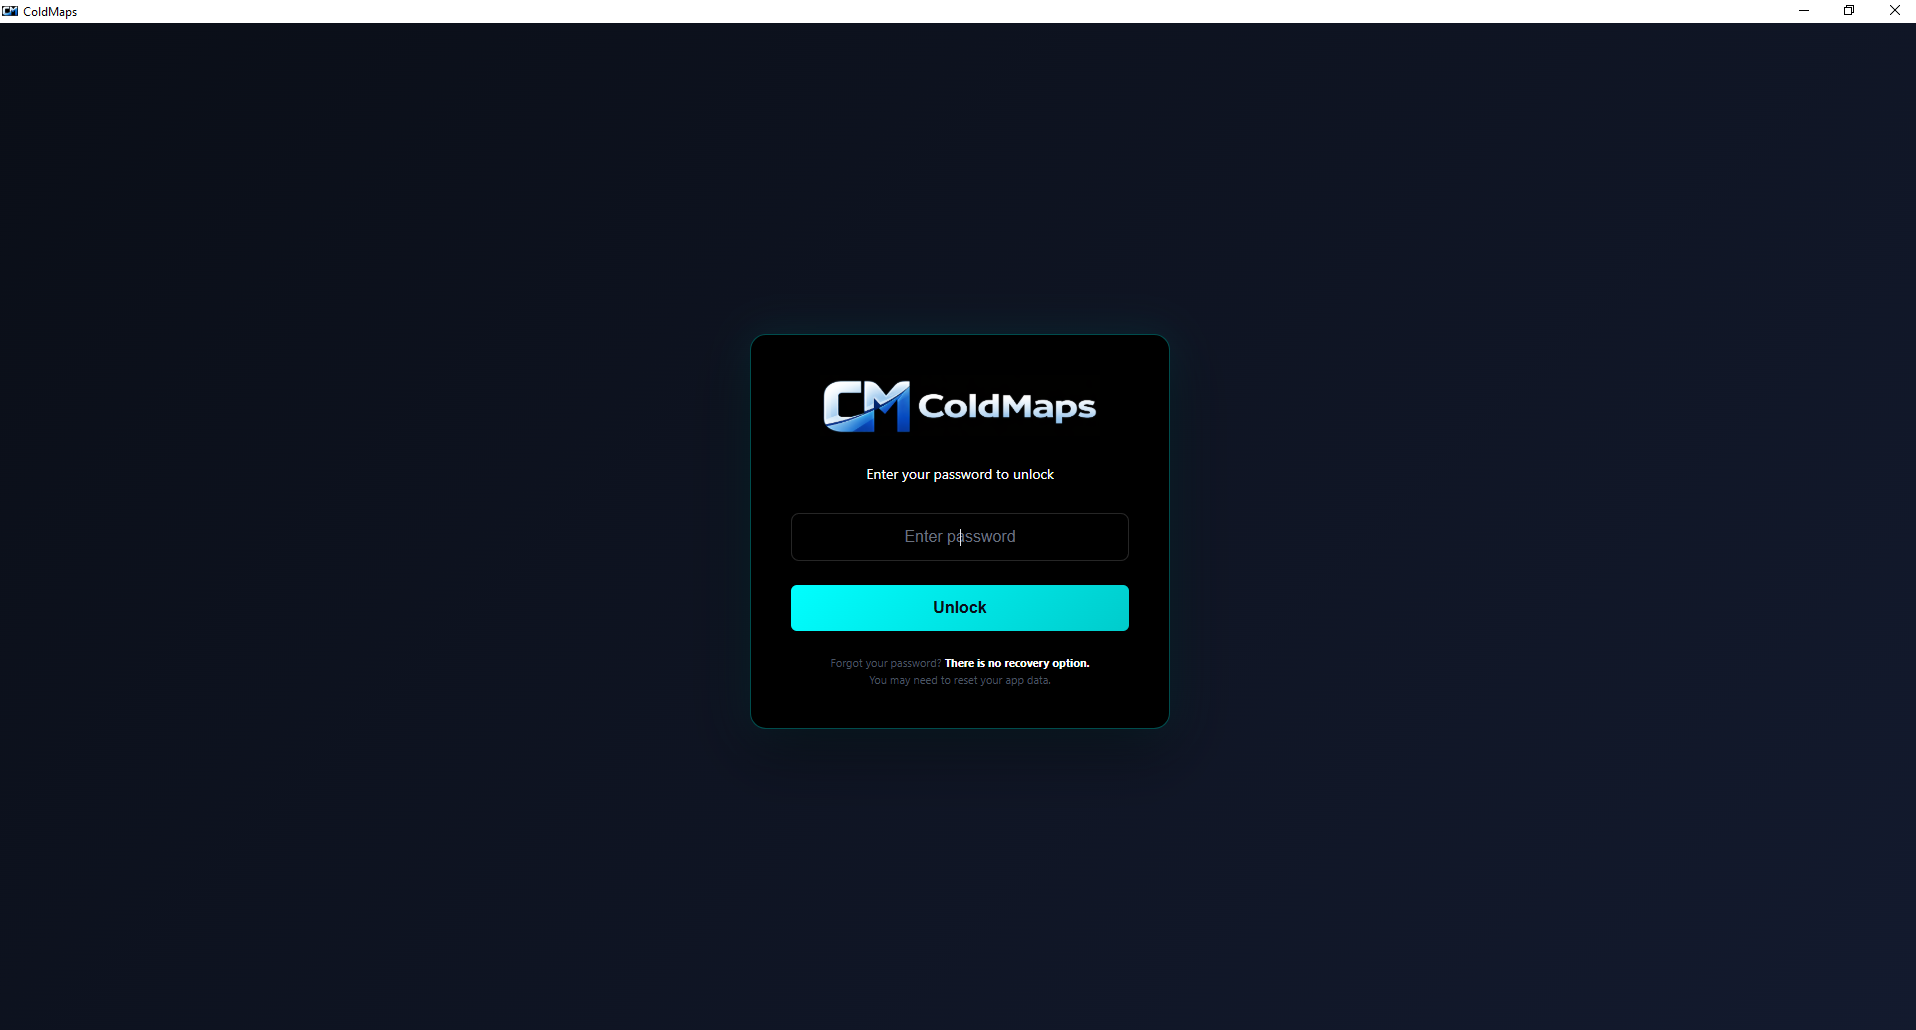
Settings > Security > Screen Lock
The screen lock prevents casual access to the app when you step away from your desk. It's a PIN or password required to open Coldmaps. On launch, you'll see a lock screen. Three failed attempts locks the app for 5 minutes.
Important: Screen lock is local access control only - it does not encrypt your data. It keeps prying eyes out, but someone with access to your file system could still read the local database.
Changing lock: Go to Settings > Security > Change Lock. Requires current PIN/password.
Removing lock: Go to Settings > Security > Remove Lock. Requires current PIN/password.
Lock Button
When screen lock is enabled, a lock icon appears in the top-right. Click it to immediately lock the app. You'll need to re-enter your PIN/password to continue.
Keyboard shortcut: Ctrl + L
Auto-Lock
Settings > Security > Auto-Lock
Automatically lock after a period of inactivity.
Free: 5 minutes only. Pro: 5, 15, 30, 60 minutes, or Never.
Inactivity means no mouse movement or keyboard input. The app locks and requires your PIN/password to resume.
Blur Addresses
Toggle in bottom-left status bar, or Settings > Security > Blur Addresses.
When enabled, wallet addresses are blurred/masked. Useful when:
— Screen sharing or presenting
— Someone is looking over your shoulder
— Taking screenshots for documentation
Click any address to temporarily reveal it.
Encrypted Exports (True Encryption)
For real encryption, export your project as a password-protected .wmap file. When you set a file password, the export is encrypted using AES-256-GCM (Galois/Counter Mode) - the same authenticated encryption standard used by banks and governments.
Your password is processed through PBKDF2 with 100,000 iterations to derive the encryption key. This makes brute-force attacks impractical even if someone obtains your file.
Store encrypted .wmap files anywhere - USB, cloud, email. Without the password, the contents are unreadable.
Local Database
The local SQLite database stores your projects on your machine. It is not protected by a user password. This is why screen lock exists - to prevent casual access when you step away.
For true security, especially for backup or sharing, use the encrypted .wmap export option.
No Recovery
There is no file password recovery. We don't store your file passwords. If you forget a file password, that .wmap file cannot be decrypted. Keep your file passwords safe.
Screen lock can be reset by deleting the app data folder (see Data Storage section for paths), but this also deletes your local data.
Themes
Settings > Display > Theme
Available Themes
System — Follows your operating system's dark/light mode preference. When your OS switches, Coldmaps switches automatically. (Default)
Dark — Dark background (#0a0a0f), light text. Easier on the eyes in low-light environments. Recommended for most users.
Light — Light background (#ffffff), dark text. Better for bright environments or if you prefer light interfaces.
Theme Details
Theme changes apply immediately—no restart required.
Themes affect: background color, text color, card colors, border colors, accent colors.
Chain colors remain consistent across themes for easy identification.
Projects & Tabs
Projects let you maintain separate wallet maps for different purposes.

Why Use Multiple Projects?
— Personal vs. business wallets
— Different blockchain ecosystems
— Monitoring external addresses for reference
— Archive of old/unused wallets
— Separate maps for different family members
Creating Projects
Click File > New Project or press Ctrl + N.
Each project is completely independent: its own wallets, connections, groups, and canvas position.
Tabs
Open projects appear as tabs at the top of the window.
— Click a tab to switch to that project
— Ctrl + Tab cycles through open tabs
— Right-click a tab for options: Rename, Duplicate, Close, Close Others
— Drag tabs to reorder them
Saving
Projects auto-save to the local database. Every change is saved immediately. You cannot lose work due to forgetting to save or a crash.
To create an external backup, use Export > Project to save a .wmap file.
Renaming Projects
Right-click the tab and select Rename, or double-click the project name in the tab.
Deleting Projects
File > Delete Project or right-click tab > Delete.
This is permanent. The project and all its data are removed from the local database. Export a .wmap backup first if you might need it later.
Keyboard Shortcuts
Learn these shortcuts to work faster.
General
Ctrl + F — Focus search bar
Esc — Deselect all / Close modal
Selection
Ctrl + A — Select all wallets
Ctrl + D — Duplicate selected
Delete — Delete selected
Backspace — Delete selected
Clipboard
Ctrl + C — Copy selected wallets (addresses + node data)
Ctrl + V — Paste copied wallets
History
Ctrl + Z — Undo
Ctrl + Y — Redo
Ctrl + Shift + Z — Redo (alternative)
Navigation
Scroll — Zoom in/out
Click + Drag — Pan canvas
Right-click — Context menu
Use Cases
Common ways people use Coldmaps to organize their wallets.
Personal Use
Keep your wallet list organized
Many wallet tools require connecting your wallet or creating an account. Coldmaps takes a different approach - everything stays on your machine.
Coldmaps stores everything locally. No login. No sync. Just you and your organized records. Add notes so future-you remembers the context.
— No accounts or sign-ups
— Data stays on your machine
— Tag and organize your way
— Your records, your control
Teams
Share securely. Not publicly.
Keep your team's treasury structure organized locally rather than scattered across spreadsheets and SaaS tools. Professional-grade data management.
Create encrypted exports to share with team members. Each person runs their own local copy. Clean, simple, organized.
— Encrypted exports for sharing
— Each member runs locally
— No cloud dependencies
— Clean data management
Wallet Sprawl
Remember what you own
You have 30 wallets. Some for airdrops. Some for DeFi. Some you made once and forgot. Which one has the tokens? Which chain was that NFT on? Good luck remembering.
Coldmaps is your personal ledger. Label everything. Add notes about purpose. Group by strategy. Six months from now, you'll actually know what's where.
— Label wallets by purpose
— Group by strategy or project
— Add notes you'll actually remember
— No more "which wallet was that?"
Estate Planning
A map for your heirs
Crypto has no customer service. If you're gone tomorrow, your family is on their own. Without a guide, your funds disappear forever.
Build a map someone else can follow. Note where seed phrases are stored. Draw connections showing how funds flow. Export encrypted and store with your estate documents.
— Visual guide for non-crypto heirs
— Notes: "seed phrase in safe deposit box"
— Show relationships between wallets
— Store with your will
Multi-Wallet Users
Organize all your addresses
You have multiple wallets for good reasons - separating funds, different chains, different use cases. Keep them all organized in one place.
A single local tool to manage everything. Label, group, and connect your addresses visually. Finally make sense of your wallet ecosystem.
— All addresses in one view
— Group by purpose or chain
— Visual organization
— Your data stays local
Built to Last
Security you can trust
Your wallet records deserve proper protection. Coldmaps keeps everything local with strong export encryption.
Local storage. Screen lock. Auto-lock when idle. AES-256 encrypted exports for backup. Professional-grade protection for your records.
— Local SQLite database
— Screen lock protection
— Auto-lock on inactivity
— AES-256 encrypted exports
Better Than Spreadsheets
Stop managing wallets in Excel
Spreadsheets are great for many things. Wallet organization isn't one of them. Rows and columns can't show relationships between addresses.
Coldmaps gives you visual connections, drag-and-drop grouping, chain-aware validation, and encrypted exports. Everything a spreadsheet can't do.
— Visual relationships, not just rows
— Spatial organization
— Chain-aware address validation
— Encrypted by default